
During installation, your engineering team will happily install the Fusion Back Office software on any PC that requires it.In the months/years after your initial installation, you may require the software to be installed on an additional PC, or you may have replaced a PC that previously had the Back Office software on it.
Installing the CRBC Hub Client
- Run the ‘CRBC.Hub.Client.Setup...**.*.x86.exe’ installation file.
- This will run the install process and automatically close.
- Once complete, navigate to the Windows button and you can find the Hub Client program in the CRBCunninghams folder.
- Open the Hub Client program.
![]()
Configuring the CRBC Hub Client
- Click the Stop button located at the bottom of the program, this will stop the service while you can make changes to the configuration.
- Click on the Settings button located on the bottom right of the program
- You can enter the IP address of the computer that is running the CRBC Hub Server Service, which is usually the one where the Fusion Database has been installed, in the Server section in the Address box. Please leave all other settings within this config screen. If you do not know, please get in touch with the Support Helpdesk and they will assist with that.
- If left blank, the program will try to automatically find the CRBC Hub Server service, if it does not automatically find the server then it is recommended to enter the IP address manually.
![]()
- Click the Back Arrow button located at the top left of the program to return to the Hub Dashboard.
![]()
- Click the Start button located at the bottom of the program to start the Hub Client server.


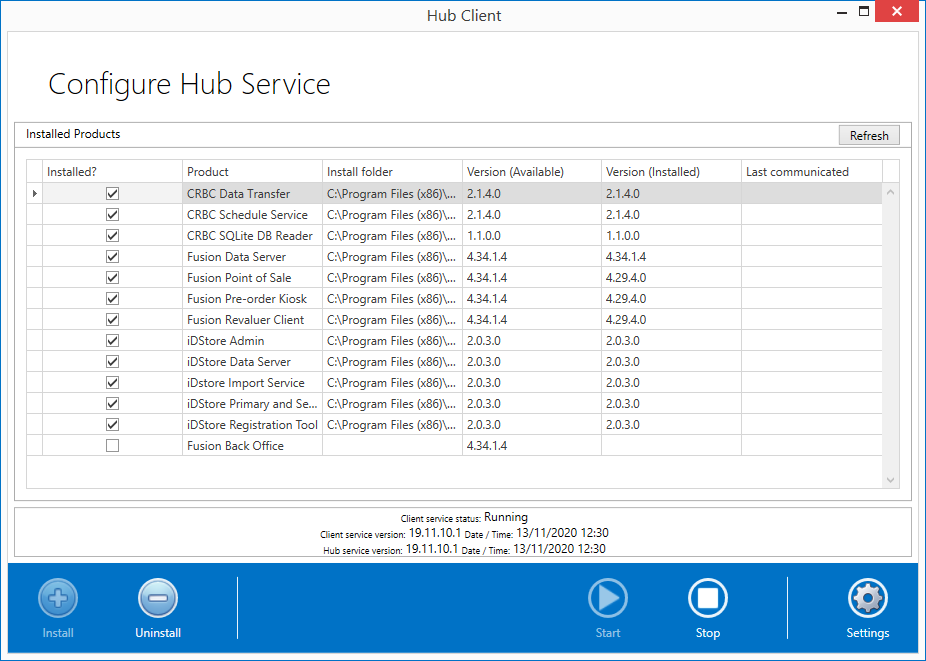
Installing Fusion Back Office
- Select Fusion Back Office from the Hub List.
- Click the Install button located at the bottom left of the program.
![]()
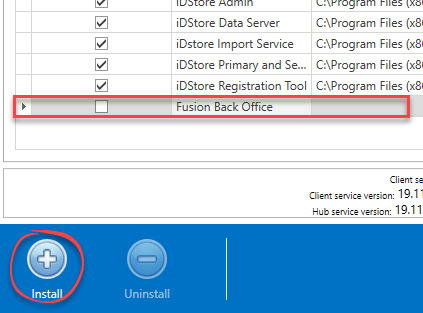
- This will proceed to the Configure Install Settings screen where you can set a target directory if needs be.
- Click the Continue Button to start the Install of the application.
![]()
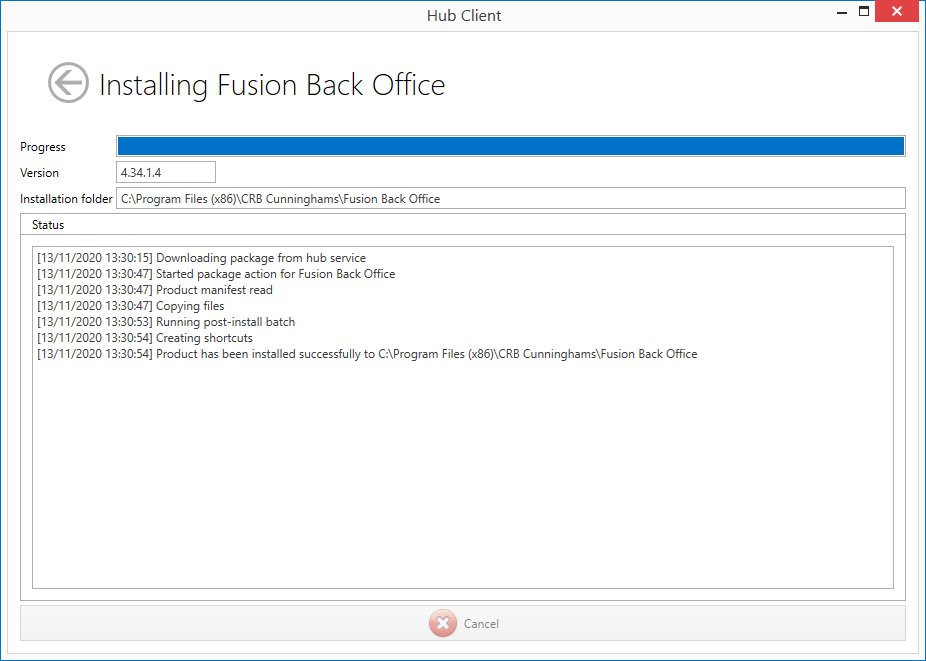
- This will start installing the application. In the Status section you will see that the Product has been installed successfully.
![]()
- Click the Back Arrow Button located at the top left of the program to return to the CRBC Hub Client dashboard. You can now close the CRBC Hub Client program.
- The Fusion Back Office shortcut should have been created and added to the desktop of the workstation.

Opening and Configuring Fusion Back Office
- Double Click on the Impact Office shortcut on the desktop.
- You will now need to click the Configure button to proceed to connect the program to the Fusion database as a new location.
![]()
- Click Next at the Connect to server screen
- Enter a server address at the Data server connection screen and click the Test Connection button. Then click Next.
- Enter a Fusion Admin user credentials at the Enter your credentials screen. If you don’t know one, call the Support Helpdesk to assist with this. Then click Next.
- Click the Create a new location and then enter a Location name and then click Next.
- Click Next at the confirmation screen.
- At the Attached peripherals screen, under the General section, select the types of Authentication being used on that location. When done, click Next.
- Click Finish to complete the Install. The Fusion Back Office program will open and you will be presented with the Login screen. You should be able to now log in and use the program.

Last modified:
13 January 2021
Post your comment on this topic.