
 The cash variance feature allows users to make sure that there are no discrepancies between the values calculated by Fusion and the actual monies received when cashing up.
Enabling cash variance
To enable cash variance in Fusion:
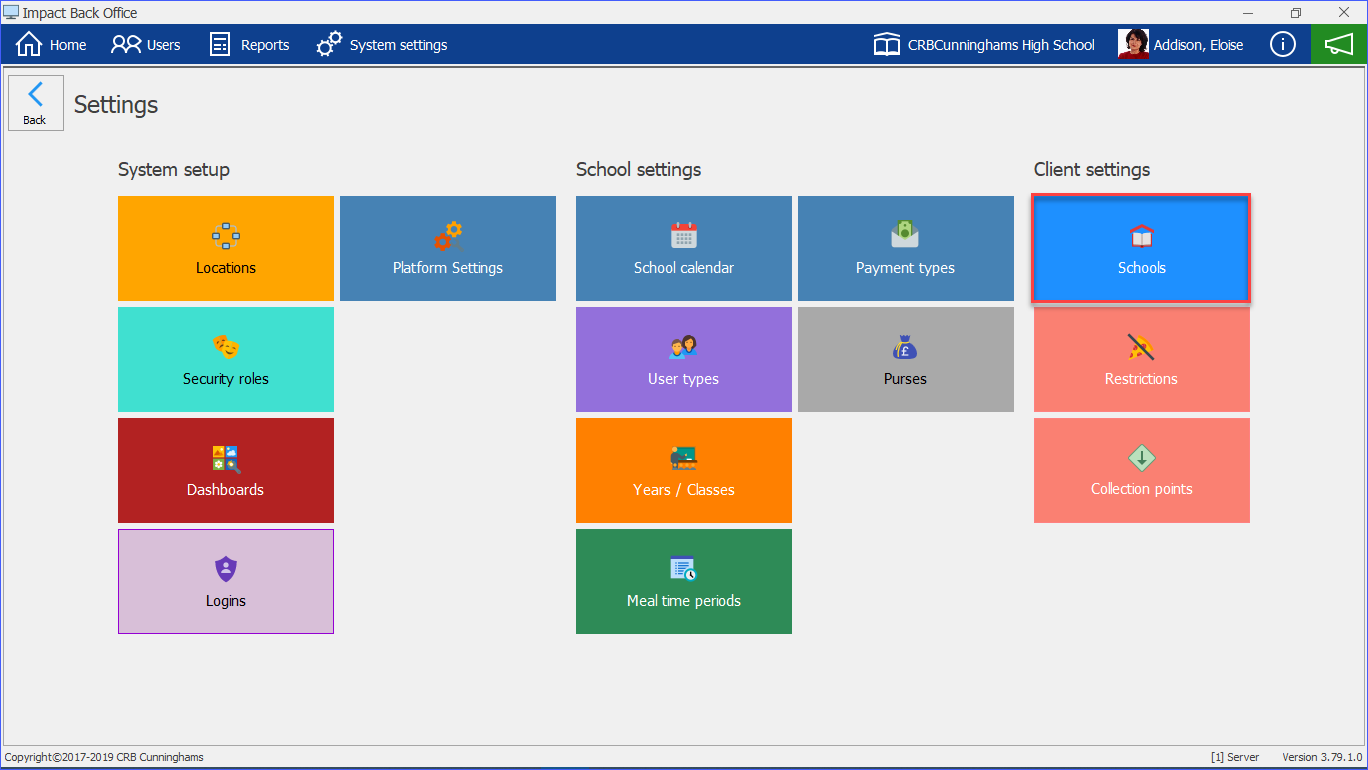
- Navigate to the System Settings and click on the Schools tile.
![]()
- Select the school you wish to enable cash variance on and press the edit button on the right hand side of the screen.
![]()
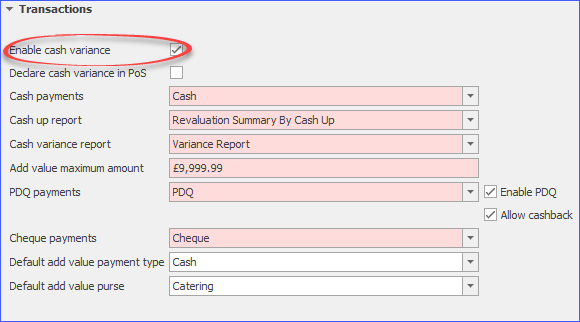
- Expand the Transactions tab by pressing anywhere on the tab’s title.
- Tick the box labelled ‘Enable cash variance’
![]()
- Press Save or Save and Close to confirm your changes.
![]()


!The ‘Declare cash variance in PoS’ box can be ticked to allow till operators to perform cash ups and enter cash values at the PoS. However, this will disable the ability for the cash values to be input for the PoS via the Fusion Back office. 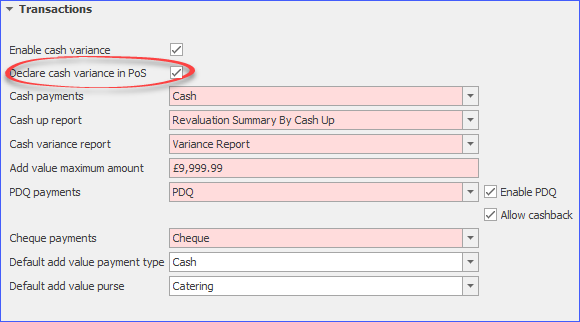
Performing a cash up with cash variance enabled
To perform a cash up with cash variance enabled:
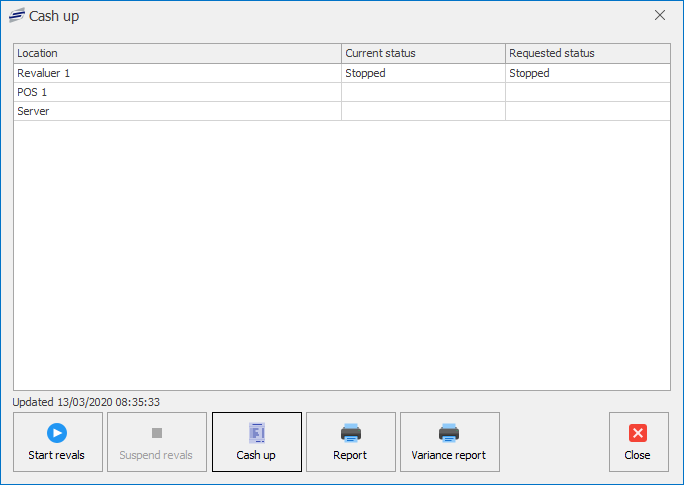
- From the home screen, click on the Cash up tile
![]()
- (If you do not have revaluation machines you can skip this part) Press the Suspend revals button.
![]()
- Press the Cash up button.
![]()
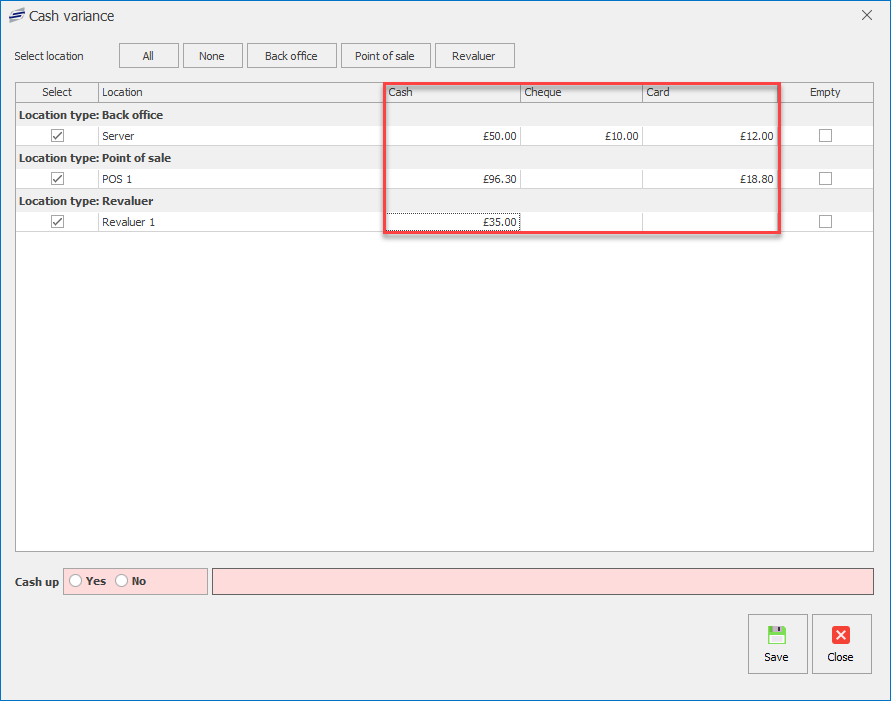
- Enter how much cash, cheque and card has been taken at each location.
![]()
- Select Yes at the bottom left hand of the screen.
![]()
- Select Yes to continue.
![]()
- Press save to complete the cash up.
![]()


Viewing the cash variance report
To view the cash variance report:
- Press the Reports button on the toolbar at the top left of the screen.
![]()
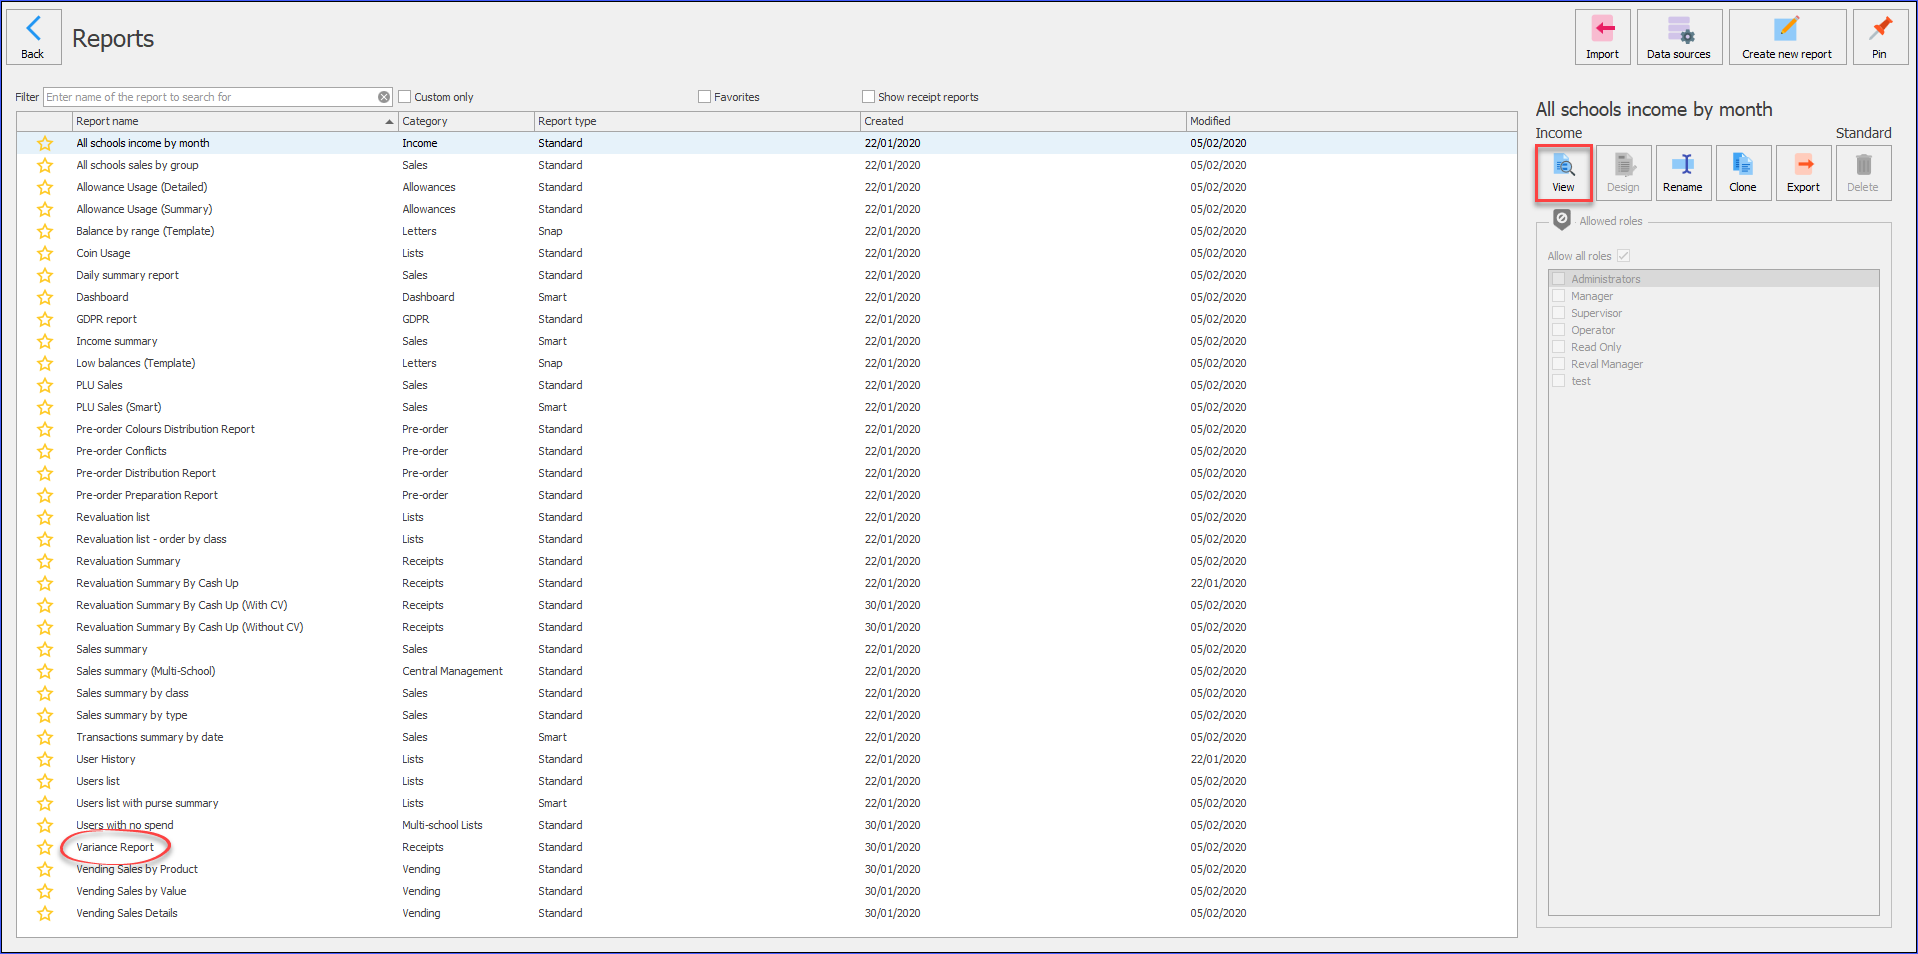
- Select the Variance Report and either double click it or press the view button on the right hand side of the screen.
![]()
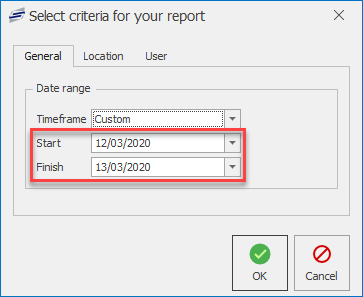
- Enter the time frame that you wish to view the cash variance report for and press OK.
![]()
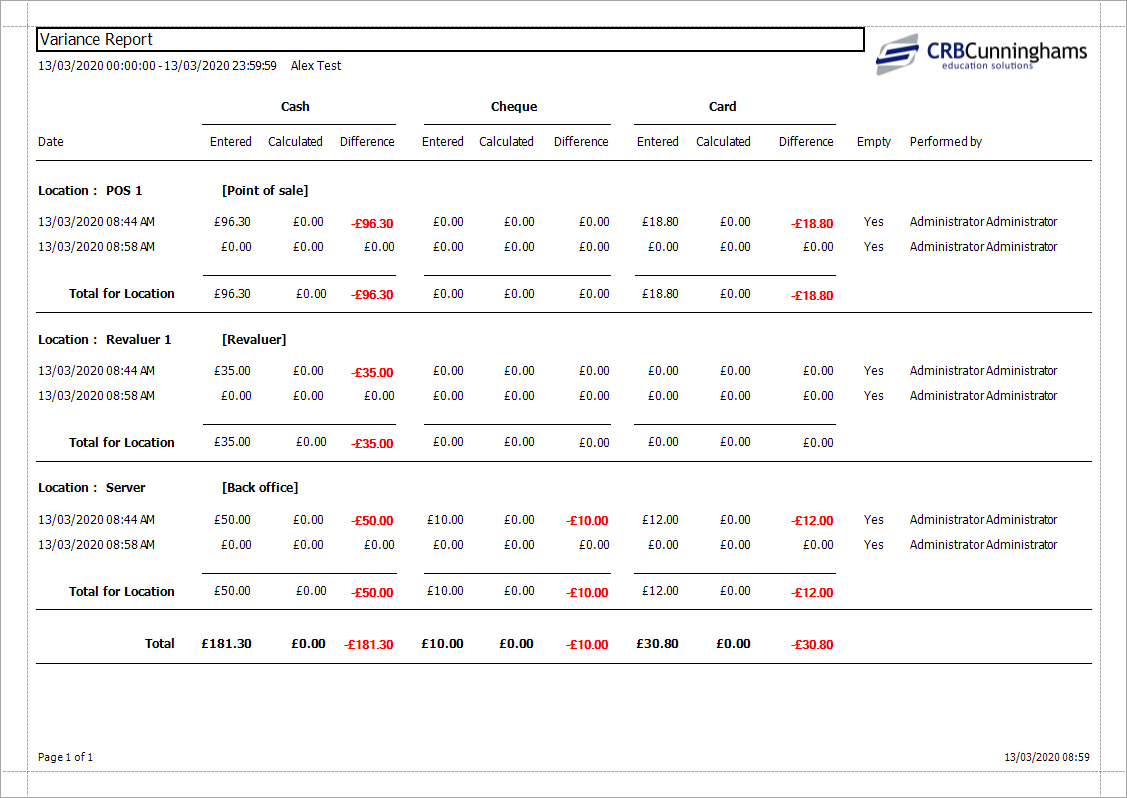
- You will then be presented with the cash variance report.
![]()

Last modified:
13 January 2021
Post your comment on this topic.