
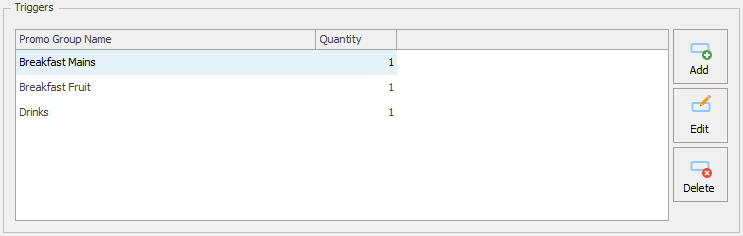
Triggers are what the system uses to determine if a promotion should be applied. Using our earlier example of a common supermarket meal deal, we would create three triggers (Mains, Snacks, Drinks) each with a quantity of 1. We would then add the applicable “main” items to the Mains group, the snacks to the Snacks group, and the drinks to the Drinks group. Setting the quantity for each group to 1 means that a user would need to purchase an item from each group before the promotion will be applied.
Another example may be that you can buy multiple items at a set price, such as two bottles of water for £1. In this scenario, we would create a single promo group, with a single bottle of water PLU contained within it, but we would then set the quantity to 2, therefore a user would need to purchase two bottles of water in that transaction for the system to trigger the promotion.
Add Triggers
- Press the Add button.
![]()
- Enter a Group name for the promo group and enter the Trigger quantity
![]()


Trigger Items
- Press the Add button.
![]()
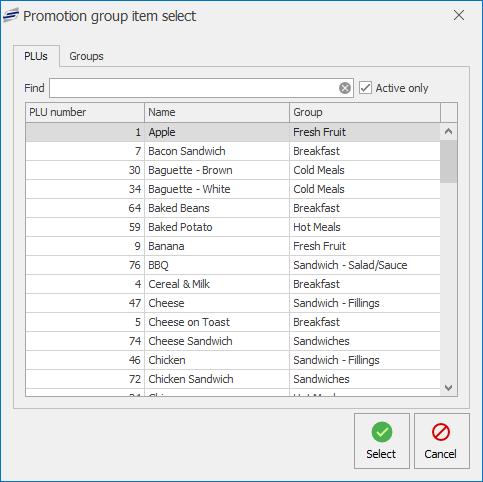
- Find and select either a PLU or Product Group.
![]()
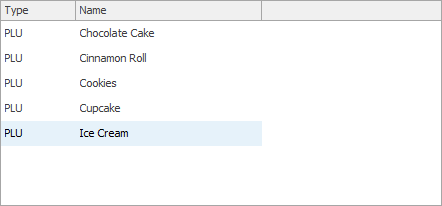
- You can continue to add more PLUs or groups.
![]()
- Press Save.
Edit Triggers
- Select a Trigger from the list and press the Edit button.
![]()
- You can Add, Edit or Delete any PLUs in the Trigger items section. If needed you can also amend the Group name or Trigger quantity.
- Press Save.

Delete Triggers
- Select a Trigger from the list and press the Delete button.
![]()
- This will remove the Promo group from the Triggers section.
- Press Save.

Post your comment on this topic.