
User details
After clicking either Add New User or Edit user, you will be taken to the User details screen. If you are adding a new user, all of the fields will be blank whereas if you are editing an exisiting user, this screen will be populated with the selected users details. Any fields with a red-ish background are mandatory.
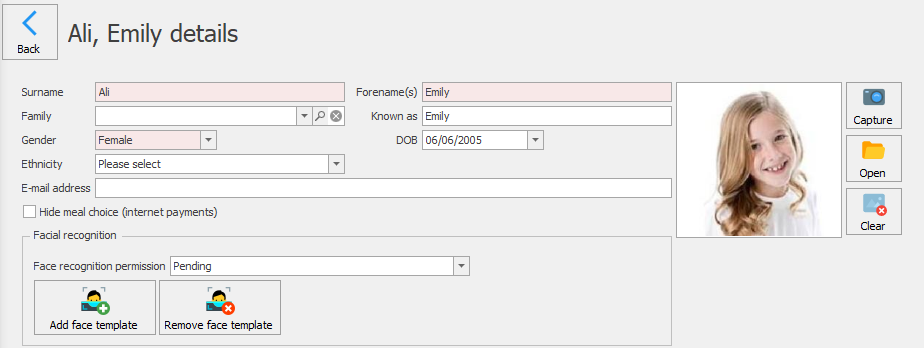
| Field | Required | Description |
|---|---|---|
| Surname | Yes | The last name of the user. |
| Forename(s) | Yes | The user’s forename(s). |
| Family | No | Users can be grouped into families. This feature is not yet fully implemented. |
| Known as | No | If the user is more commonly known by another name, you can enter this here. This will replace their forename on the tills etc. |
| Gender | No | The user’s gender. Set by using the dropdown menu. If the user’s identified gender is not listed as an option, use the magnifying glass icon and add it. More information on managing genders can be read here. |
| DOB | No | The user’s date of birth. |
| Ethnicity | No | The user’s ethnicity. |
| E-mail address | No | The user’s (or their parent’s/guardian’s) email address. |
Setting a user photo
When it comes to the user photo we have two options:
Capturing a photo using an attached webcam
If you have a web camera attached to your computer, you are able to take a photo of the user directly into Impact. To do this:
- Press the Capture button.
![]()
- The ‘Capture photo’ screen will be opened. If there is no webcam configured, you will see a “No webcam found” message. If the webcam is connected and working, an image will be shown in the left box.
- Press Capture to take an image.
![]()
- The captured image will be displayed on the right. Drag the square to crop the area for the photo.
- If you are happy with the image press Save to complete, or press Capture to take another. Pressing Cancel will close the window without saving any changes.


Importing a user photo
If you already have a user photo in the form of an image file, you can import this directly into Impact.
- Press the Open button.
![]()
- Use the window to navigate and select the image that you wish to use.


Clear a user photo
You can delete a photo from a users account.
- Press the Clear button.
![]()
- Select either Yes or No to confirm the action.
Additional user details
As well as the details listed at the top of the user details screen, the bottom of the screen has additional fields where you can store information about that user. These tabs are discussed in the next few sections.
Hide meal choice
There is an option to hide meal choices that will be sent to the online payment provider’s transaction log. From the age of 16, the user has the right to decide whether they can deny their parent’s access to the description of the meal choices they have made at a point of sale. To enable this simply click the Hide meal choice (internet payments) box and Save the changes.

Post your comment on this topic.